Last updated November 18, 2026

Free written scope consultation - allowances, timeline, and change-order rules on paper before a single trade is scheduled
Home Additions & ADU Troubleshooting: Common Problems and How to Fix Them
The most expensive call a homeowner makes after an addition is finished isn’t about something that broke. It’s about a door that swings the wrong way, a breaker that keeps tripping, or a back bedroom that runs 10 degrees hotter than the rest of the house. These aren’t bad luck, and they aren’t accidents. They’re predictable outcomes of design and systems decisions made long before anyone hung drywall. In our experience building and repairing additions across Vacaville, we’ve learned that the problem usually announces itself in the first 12 months. This guide shows you how to tell a cosmetic quirk from a structural warning, what to check before you panic, and when to call someone.
Quick Answer
Most home addition and ADU problems are not construction defects – they’re connection and systems failures: a roof tie-in that wasn’t flashed right, an HVAC system never sized for the new square footage, or an electrical panel that was never assessed before the build. A small hairline crack at the joint between old and new structure is normal settling. A crack that widens, a ceiling that sags, water staining near the roofline, or a breaker that trips repeatedly are warnings that need professional eyes quickly. The fix depends entirely on which category you’re in.
Styles & brands we work with
- Kitchen remodeling
- Bathroom remodeling
- Home additions & ADU
- Roofing
- Windows & doors
- Driveway & pavers
- Fence
Table of Contents
- Cracks at the Connection Point: Settling vs. Differential Movement
- HVAC Load Failures: Why the New Room Is Never Comfortable
- Water Intrusion at the Roof Tie-In
- Electrical Problems Specific to ADUs
- The Paperwork You Should Have Gotten at Completion
- Vacaville-Specific Issues: Soil, Heat, and Code
- A Step-by-Step Diagnostic You Can Run Yourself
- Common Mistakes to Avoid
- When to Call a Professional
Cracks at the Connection Point: Settling vs. Differential Movement
Every addition creates a seam where new construction meets old. That seam is where the two structures negotiate, and a little negotiation is normal. New wood framing shrinks as it dries. Fresh concrete footings settle a fraction of an inch in the first year. The existing house has already done all of that. So when the two move at different rates, you get a hairline crack at the drywall joint or a small gap where the new wall meets the old one. That’s expected, and it’s cosmetic.
The warning sign is differential foundation movement – when the new foundation and the old foundation are moving in genuinely different directions, or one side is sinking while the other stays put. That’s a structural conversation, not a drywall patch. Here’s how to tell them apart:
- Hairline cracks (under 1/16 inch) at the drywall seam: Normal settling. Cosmetic. Monitor it.
- Cracks that widen over 3-6 months: Concerning. Something is still moving.
- Doors and windows in the new space that suddenly stick: Framing is shifting. Investigate.
- Stair-step cracks in exterior brick or stucco: Foundation movement. Call a structural professional.
- A visible gap between old and new floor levels: Differential settlement. Urgent.
One thing to check first: was the soil under the new footing properly assessed before the pour? Vacaville sits on a mix of expansive clay soils in some areas and more stable alluvial ground in others. If the addition was engineered for the wrong soil profile, movement shows up faster and larger. We’ve seen additions in Vacaville that developed a 1/4-inch step at the threshold within two years because the footing design didn’t account for the shrink-swell behavior of the local clay. That’s a rebuild, not a patch.
HVAC Load Failures: Why the New Room Is Never Comfortable
Here’s the pattern: a family adds 400 square feet, extends the existing ductwork with a couple of runs, and then spends the next three summers wondering why the new room is hot. The existing furnace and air conditioner were sized for the original house. Add square footage without adding capacity – and without running a fresh load calculation – and the system spends every hour of every day trying to catch up. It never does.
This is one of the most common post-completion complaints we troubleshoot, and it’s almost always predictable. A proper HVAC load calculation (Manual J) accounts for square footage, insulation values, window area and orientation, ceiling height, and climate zone. When an addition goes in, that calculation has to be redone for the whole house. Many contractors skip it and just tap into the existing system. Here’s how to identify if your system is undersized:
- Check the temperature differential. On a hot Vacaville afternoon, measure the air coming out of a supply register in the new room and the air going into the return. A healthy system delivers roughly 15-20 degrees of cooling. If you’re seeing 8-10, the system is struggling.
- Track runtime. If the AC runs continuously from noon to 8 p.m. in July and still can’t hit the thermostat setpoint, it’s undersized for the new load.
- Feel the airflow at the farthest register. A weak trickle means the duct runs are too long or too narrow for the new distance.
- Compare room to room. If the new room is consistently 6-10 degrees warmer than the original house, the load calculation was never redone.
The fix isn’t always a new system. Sometimes a dedicated mini-split for the addition is the right answer, sometimes rebalancing dampers and adding a return in the new space solves it, and sometimes the original system genuinely needs upsizing. What matters is that someone runs the actual numbers rather than guessing.
Water Intrusion at the Roof Tie-In
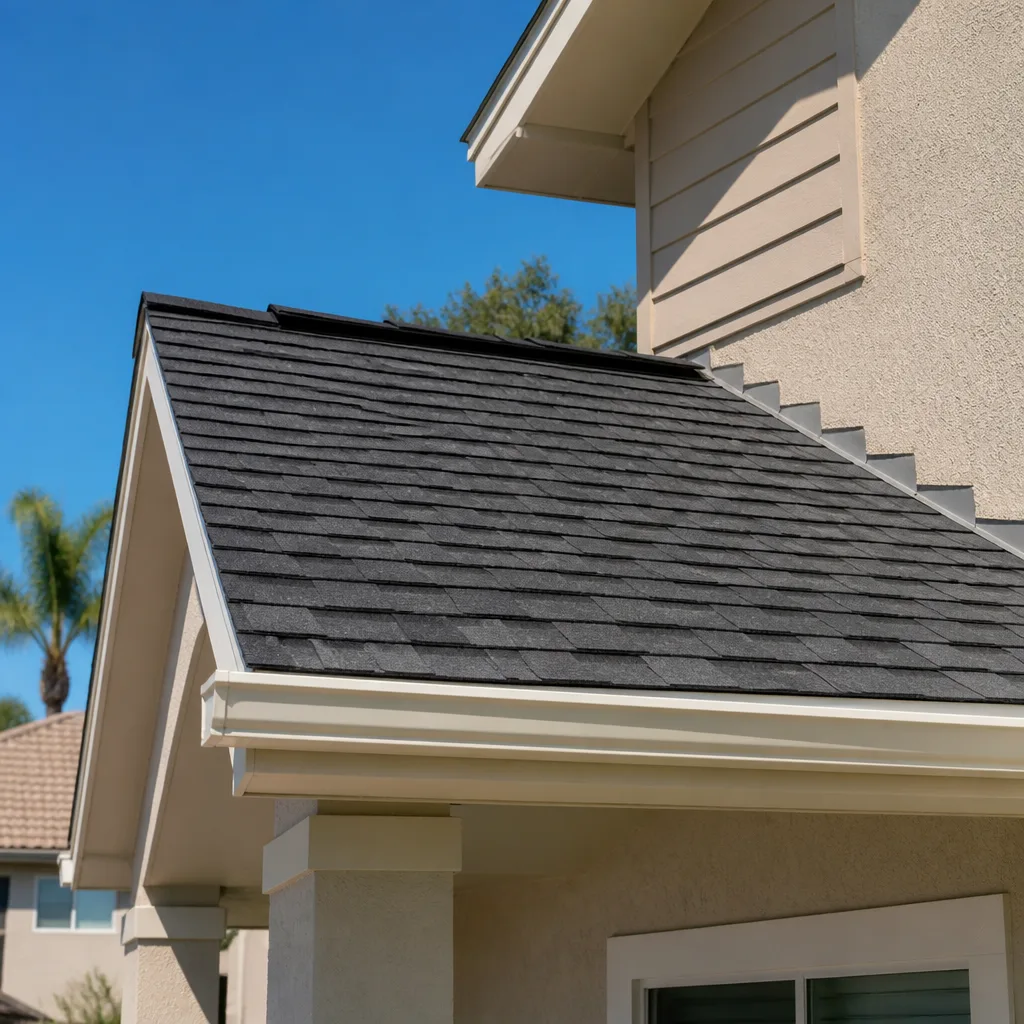
This is the single most common addition failure location we see. Where the new roof meets the existing roofline, water has to be directed away from the seam with proper step flashing, counter-flashing, and a continuous underlayment transition. When that detail is done wrong – or when it’s done with caulk instead of flashing – water finds the gap and starts working its way into the wall cavity. By the time you see a stain on the ceiling, the damage has usually been growing for a season or more.
Early signs to watch for:
- Discoloration or water staining on the ceiling or upper wall near the tie-in
- Bubbling or peeling paint on the interior wall adjacent to the seam
- Visible gaps, cracked sealant, or lifted flashing on the exterior at the roof junction
- Granules from asphalt shingles collecting in gutters below the tie-in
- A musty smell in the new room after heavy rain
Now the important distinction: when is caulk a fix, and when is it a band-aid? Caulk is fine for sealing a small gap where the flashing is correct but a bead has failed. Caulk is a band-aid – and a temporary one – when it’s being used to cover the absence of flashing or a lousy tie-in detail. If you find yourself re-caulking the same joint every year, that’s the clue. The real fix requires removing the shingles at the junction, installing proper step flashing and a water barrier, and rebuilding the tie-in. That’s a roofing job, not a Saturday project.
In Vacaville, we deal with a specific local pattern: a long dry season followed by the first big storm in November or December. Every minor flashing deficiency that stayed dormant all summer becomes a leak in the first substantial rain. That’s why we recommend homeowners check the roof tie-in in October, before the weather turns.
Electrical Problems Specific to ADUs
A tripping breaker in a brand-new ADU is rarely a bad breaker. More often it means the main electrical panel was never properly assessed before construction started. A typical older Vacaville home has a 100-amp or 150-amp service. Add a 600-square-foot ADU with its own kitchen, water heater, mini-split, washer-dryer, and lighting load, and that main panel is being asked to carry substantially more than it was designed for. The breakers start tripping because the whole service is at its limit, not because the local circuit is faulty.
Here’s what a proper pre-construction electrical assessment should have covered:
- Main service capacity: What’s the total amperage of the existing service, and what does the new load add?
- Panel bus bar and breaker capacity: Even if the service is 200-amp, is there physical space and bus capacity for the new circuits?
- Grounding and bonding: An ADU is a separate structure – does it have its own grounding electrode system and how is it bonded?
- Sub-panel design: Should the ADU be fed from a sub-panel, and is that sub-panel sized correctly for the loads?
- GFCI and AFCI requirements: Kitchens, bathrooms, and laundry areas in the ADU have their own code requirements.
If your ADU breaker trips when the water heater and the dryer run at the same time, or when the mini-split kicks on, that’s a load problem, not a breaker problem. Don’t keep resetting it. Call an electrician to look at the service capacity. The fix might be as simple as moving a load to a different panel, or it might be a service upgrade – but either way, the diagnosis has to be done properly. This is a case where we strongly recommend a licensed electrician: panel work and service upgrades carry real shock and fire risk and aren’t a do-it-yourself project.
The Paperwork You Should Have Gotten at Completion
Here’s a fact almost nobody tells homeowners: the fastest, cheapest troubleshooting happens when you have the right documents on hand. When a problem shows up two years after an addition, a contractor who can lay hands on the original plans, the load calculations, the permit records, and the material specs solves the issue in an hour. A contractor who can’t ends up doing exploratory demolition to figure out what’s inside the wall.
A complete post-completion package should include:
- As-built drawings: The plans updated to reflect what was actually built, including any field changes.
- HVAC load calculation and equipment specs: Showing what the system was sized for and what model was installed.
- Electrical panel schedule: Which breaker controls what, and the service capacity documented.
- Permit and inspection records: The final inspection sign-off for the addition.
- Material and product information: Brand, model, and warranty documents for windows, doors, roofing, and any appliances.
- Manufacturer warranties: Individual product warranties are separate from any workmanship guarantee, and you need both.
If your contractor didn’t provide these, do a records request with your city’s building department. The permit file usually has the approved plans and inspection records, and you can usually get a copy for a small fee. Then document what you can yourself: photograph the panel with the door open and every circuit labeled, measure and note room dimensions, and write down the make and model of every system. It takes an afternoon and saves you a lot of money later.
Vacaville-Specific Issues: Soil, Heat, and Code
Not every addition problem is universal. Vacaville has a specific set of conditions that shape what goes wrong and how it gets fixed.
Soil. Vacaville’s ground varies block by block. Some areas have expansive clay that swells and shrinks with the seasonal moisture cycle, and additions that didn’t account for it develop movement problems faster than additions built on more stable ground. This is why a pre-construction soils report matters, especially on the south and west sides of town where the clay is more prevalent. If you’re troubleshooting movement, the soil is the place to start.
Heat. Vacaville summers routinely push past 100 degrees. An addition with west-facing windows and no proper shading or insulation gets hammered by afternoon sun, which drives up cooling demand and exposes any HVAC sizing weakness immediately. We’ve seen additions that perform fine in spring and become unusable in July and August because nobody calculated the west-facing solar gain into the load. Fixing it can mean added insulation, window film, exterior shading, or a dedicated cooling unit – but it has to be diagnosed, not guessed at.
Code. Vacaville follows California’s Title 24 energy code, which has real requirements for addition insulation, window performance, and duct sealing. An addition built without those details can fail comfort and energy expectations even when the construction is sound. If you’re troubleshooting energy complaints, ask whether the additions met the Title 24 requirements on the permit. Often the answer is the key to the whole problem.
Fire zone. Parts of Vacaville sit in higher fire severity zones, which affects the materials allowed on additions – roofing class, exterior siding, and window ratings. If you’re seeing problems with the exterior on one side of the addition, it might not be a defect at all; it might be a material that doesn’t belong in that zone.
A Step-by-Step Diagnostic You Can Run Yourself
Before you call anyone, walk through your addition or ADU once a season. This is the same basic checklist we run on our own project walkthroughs, and it’s built so you can do it with your own eyes and hands and a phone camera. It won’t replace a professional inspection, but it tells you exactly what kind of problem you’re facing.
- Walk the perimeter of the connection. Look at the joint between old and new structure from inside and outside. Photograph any crack with a coin or ruler next to it for scale. Compare to photos you took six months ago – change over time is more important than the size of the crack itself.
- Feel for sticking doors and windows. Open and close every door and window in the addition. Note any that suddenly bind, drag, or no longer latch. Both directions of the whole house – check the original house too, because movement at the connection can affect both.
- Check the ceiling and upper walls for water staining. Especially near the roof tie-in and under the eaves. A fresh stain after a storm is an immediate call.
- Run the AC and track performance. Measure the temperature difference between the return and the farthest supply register. Note the runtime and whether the room ever hits setpoint.
- Test every electrical outlet and note any breaker trips. Which breaker trips, and what was running at the time? Note it every time. The pattern is the diagnosis.
- Look at the exterior grade. Check that the ground slopes away from the addition on all sides. A negative slope pulls water toward the new foundation, which is a silent problem for years and a big one when it shows up.
- Photograph everything, dated. Build a dated log with your phone. It’s what a professional will ask for anyway.
Do this in spring and fall. It takes 20 minutes and gives you an actual record instead of a memory.
Common Mistakes to Avoid
- Caulking over a leak instead of fixing the flashing. Caulk covers the symptom for one season and lets water keep working behind the wall. Each re-caulk makes the eventual repair bigger and more expensive.
- Adding square footage without a new HVAC load calculation. The system was sized for the original house. Every square foot added without a new calculation compounds the comfort problem.
- Ignoring the electrical service before the build. Running ADU circuits off an already-loaded panel is the setup for every tripping breaker to come. The assessment should happen before construction, not after.
- Skipping the soils report on expansive ground. It’s cheap compared to the foundation repairs that follow when footing design doesn’t match the soil.
- Not documenting the as-built. Two years later, the question “what’s behind this wall” has a cheap answer with documents and an expensive one without.
- Treating a widening crack as a drywall problem. Patch it once if it’s hairline. If it keeps coming back, stop patching and get a structural evaluation.
- Assuming Vacaville heat is universal. A west-facing addition on the ridge is a completely different cooling problem than one shaded by mature trees. Design decisions have to reflect the actual site, not the averages.
If you’re planning a build rather than troubleshooting an existing one, our team at Groundwork Construction Co. of Vacaville works through these issues before the first shovel. That’s where most of these problems get prevented, and where the Home Additions & ADU in Vacaville service goes beyond the build: we deliver the documentation package at completion so troubleshooting is a phone call, not an excavation.
When to Call a Professional
Some problems genuinely need a professional – and the sooner, the better. Call someone if: a crack at the connection point widens over a few months, a door or window that used to work suddenly won’t close, water staining appears anywhere on the ceiling or upper walls, a breaker trips repeatedly (especially if it’s warm to the touch), or if your addition is heating and cooling so badly that you can’t use it. These are structural, envelope, or electrical signals, and none of them improve with time.
Also call if you simply don’t have the documentation. Whether you’re troubleshooting a specific symptom or you’re prepping for a future sale, having the as-built, permit, and equipment records in hand is a genuine value-add, and a contractor who has their records in order can reconstruct the file.
Groundwork Construction Co. of Vacaville offers free estimates in Vacaville – call (888) 276-8078. We’ll walk the addition, run the diagnostics, and tell you honestly what’s cosmetic, what’s structural, and what it will take to fix. Live person on the phone any hour, and our 730-Day Done Right Promise means if we built it and it isn’t right, we make it right.
See the difference
 Before
 After
 Before
 After
 Before
 After
Frequently Asked Questions
Hairline cracks under about 1/16 inch at the drywall joint are normal settling and generally cosmetic. A crack that’s wider than a credit card, keeps widening over time, or is accompanied by a sticking door, a floor step, or stair-step cracks on the exterior is a structural warning that needs a professional evaluation. Photograph it with a ruler next to it, then photograph again in 60 days; the change over time is the real diagnostic. Call (888) 276-8078 if you want a set of trained eyes on it.
The HVAC system was almost certainly sized for the original house and never recalculated for the added square footage, or the new room has unaddressed west-facing solar gain. Both are common in Vacaville. The first step is measuring the temperature difference between the return and the farthest supply – a healthy system delivers 15-20 degrees of cooling, and anything under 10 is a load problem. Call (888) 276-8078 for a free estimate on a diagnostic walkthrough.
A tripping breaker in a new ADU usually means the main electrical panel was never properly assessed before construction – the existing service doesn’t have the capacity for the new load. It’s a service-capacity problem, not a bad breaker. Don’t keep resetting it; have a licensed electrician evaluate the panel. Call (888) 276-8078 and we’ll help you sort out which trade needs to be on this.
Only if the flashing underneath is correct and a bead has failed. If water is getting behind the flashing, caulk is a temporary band-aid that hides the problem for a season while it does more damage. The tell is whether you find yourself re-caulking the same joint every year – that’s a hint the flashing itself needs to be redone. That’s a roofing job, not a homeowner patch.
No. Request the permit file from the City of Vacaville’s building department – approved plans and inspection records are usually available for a small copy fee. Then photograph your electrical panel with circuits labeled, measure the addition, and note the make and model of every system and appliance. It’s not as good as the original package, but it gives the next contractor enough to work with. Call (888) 276-8078 if you’d like help reconstructing what’s missing.
Start with the permit record: if the final inspection was signed off by the City of Vacaville, the built work passed the code checks at the time. California’s Title 24 energy requirements change, so a permit issued years ago reflects the code in effect then – not today’s. If you’re troubleshooting energy and comfort issues, ask whether the addition documented its Title 24 compliance, and check that the materials match. Call (888) 276-8078 for a free estimate if you want a professional review of the file.
The Bottom Line
Most addition and ADU problems show up in the first year, and most of them are avoidable. A hairline crack at the connection is normal; a widening one is not. An HVAC that can’t keep up points to a load calculation that was never run. A leaking roof tie-in means flashing was skipped. A tripping ADU breaker means the panel wasn’t assessed. And a missing documentation package makes every future repair more expensive. Know which category you’re in and act accordingly. If you want any of it looked at by someone who’s seen it before, call Groundwork Construction Co. of Vacaville at (888) 276-8078 for a free estimate.
While you’re thinking about your property, the same attention applies to the outside of the house. Our Driveway & Pavers in Vacaville work fixes the drainage and grade issues that quietly cause addition foundation problems, and our Fence Installation in Vacaville team handles the property line and yard side – we work with ViewLux and Barrette materials where the perimeter needs to match the build.
Whatever’s not right on your addition, our promise is simple: Upfront pricing, no surprises, background-checked and uniformed technicians on every project, and the 730-Day Done Right Promise backing the work from foundation to finish line. You can also take advantage of our current offers – $1,000 off projects over $10,000 and 0% financing for 18 months – and start with a free project estimate and design consult. Call (888) 276-8078 to schedule yours.
Written by the team at Groundwork Construction Co. of Vacaville.