Last updated November 18, 2026

Free written scope consultation - allowances, timeline, and change-order rules on paper before a single trade is scheduled
Driveway & Pavers Maintenance Schedule: What to Do and When
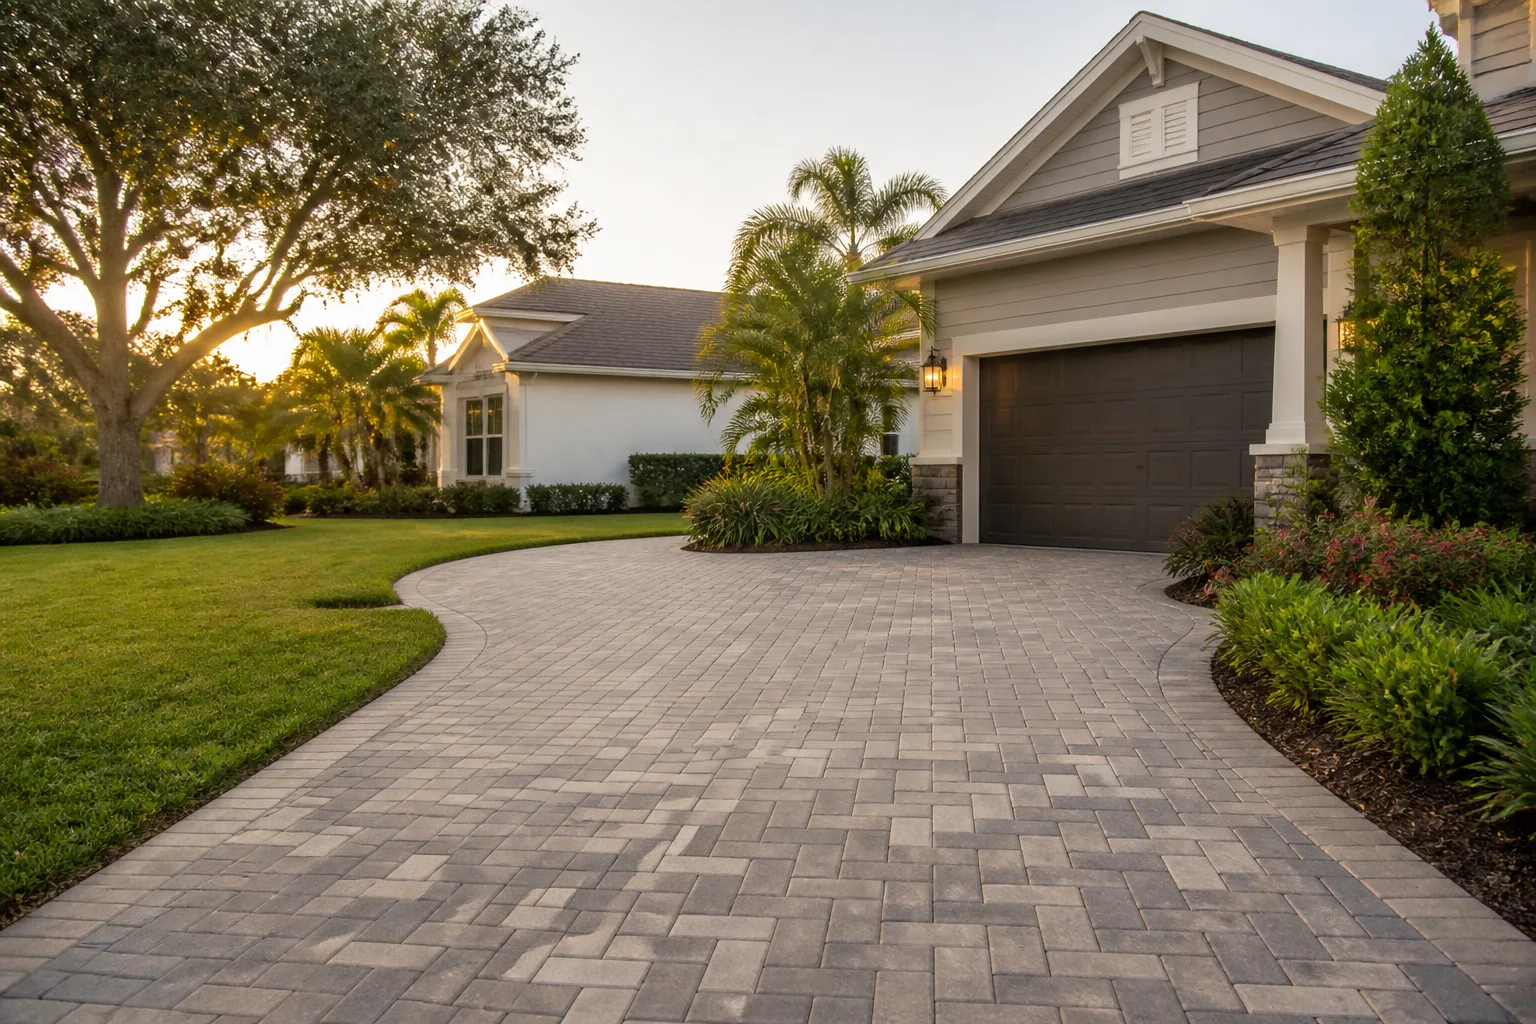
Pressure washing your pavers every spring feels productive. It’s also one of the fastest ways to strip out joint sand, open up the seams, and start the slow sinking cycle that ruins a driveway. Most of the homeowners we talk to in Vacaville are doing too much of the wrong thing and skipping the two or three tasks that actually matter. A paver driveway built right and maintained on a real schedule will outlast poured concrete by decades. Maintained on instinct and guesswork, it can fail inside ten years. This guide lays out the schedule that works: what to do each season, what to stop doing entirely, and how to check your own driveway in about 20 minutes a year.
Quick Answer
A paver driveway needs three things to last: joint sand kept topped up, a 20-minute annual inspection to catch shifting and ponding early, and a fresh coat of sealer every 3 to 5 years once the old coat stops beading water. Deep clean once a year in spring, not more. Skip the high-pressure blasting, skip the weekly washing, and address drainage before the rainy season starts, not after. That’s the whole schedule.
Styles & brands we work with
- Kitchen remodeling
- Bathroom remodeling
- Home additions & ADU
- Roofing
- Windows & doors
- Driveway & pavers
- Fence
Table of Contents
- The Only Three Maintenance Tasks That Matter
- What Actually Harms Pavers (And What Doesn’t)
- Seasonal Timing for Vacaville’s Climate
- Re-applying Polymeric Joint Sand Without Trapping Moisture
- Sealer Reapplication: The Bead Test and the Right Window
- The 20-Minute Annual Inspection Checklist
- Why Pavers Outlast Concrete (When Maintained)
- What Paver Maintenance Costs in Vacaville
The Only Three Maintenance Tasks That Matter
Strip away the marketing from every paver-care product on the shelf and you’re left with three tasks that genuinely extend the life of a driveway. Everything else is cosmetic or, worse, actively harmful.
1. Keep the joints full. The sand between pavers is the structural system, not decoration. It locks each unit against its neighbors so the load of a car spreads across dozens of pavers instead of one. Once joints wash out, individual units start to rock, and rocking is the first sign of base failure. On a paver driveway in Vacaville, our technicians typically see joints drop a quarter inch or more within two summers of a washout.
2. Inspect once a year for shifting, settling, and ponding. A 20-minute walk with a hose and a level catches roughly 90% of the problems that lead to expensive repairs. Potholes that hide under parked cars, a low corner that now holds water after storms, a paver that has heaved half an inch at a tree root: all of these are cheap fixes when found early and full rebuilds when ignored for three seasons.
3. Re-seal on the right schedule. Sealer keeps water from soaking into the pavers and slows the UV fading that turns a dark charcoal driveway pale gray in Vacaville’s summer sun. Reapply every 3 to 5 years, and only once the old coat has stopped performing. Sealing too often simply traps moisture underneath.
That’s the entire core schedule. Notice what’s missing: no pressure washing ritual, no scrubbing with acid, no yearly “refresh” that a salesperson pushes. The single biggest mistake we see on paver driveways throughout Vacaville is over-treatment. The pavers get blasted clean, the sand gets blown out, the homeowner calls a pro to put it back, and the cycle repeats every 18 months.
What Actually Harms Pavers (And What Doesn’t)
Paver blocks themselves are close to indestructible. A Belgard or comparable concrete paver rated for a driveway will last 30 years or more without fading away entirely. What fails is the system around the pavers: the joint sand, the bedding layer, and the drainage plan. The paver is not the problem. The installation and maintenance of everything between and under the pavers is.
Here’s what causes real damage, versus what people worry about but doesn’t matter:
- High-pressure washing: real damage. A 3,500-PSI surface cleaner removes joint sand in minutes and can pit the face of softer pavers. Once the sand is gone, pavers rock, water gets in, and the sinking cycle begins. Use a garden hose and a soft-bristle broom for routine cleaning.
- Chemical cleaners and muriatic acid: real damage. Standard acid washes can etch the paver surface and strip sealer. A pH-neutral paver soap diluted per the label is all that a Vacaville driveway needs for typical dust and pollen buildup.
- De-icing salt in winter: real damage. Vacaville winters don’t usually call for salt, and that’s a good thing. Chlorides can attack the surface of even high-quality pavers. Use sand for traction on the rare icy morning, and sweep it up afterward.
- Weeds in joints: manageable, not catastrophic. A few weeds are a sign a joint has lost sand. Top it up, and the weeds disappear. Hand-pull instead of spraying herbicide, which can kill landscaping adjacent to the driveway.
- Rain and snow: not a real threat. Pavers are meant to get wet. Water is only a problem when joints aren’t full or the driveway doesn’t drain.
- Sunlight: manageable with sealer. UV fades surface pigment over 10 to 15 years. Good sealer slows it dramatically. It doesn’t stop it, and that’s fine.
Once you internalize this list, the right schedule gets easier to hold to. You’re not fighting the pavers. You’re protecting the joints, the bedding, and the drainage underneath.
Seasonal Timing for Vacaville’s Climate
Vacaville’s climate is a gift to paver owners if you learn the rhythm. Long, hot summers with numbers north of 100°F in July and August. Mild, wet winters that bring most of the annual rain between November and March. Very little freeze-thaw. That combination means the biggest seasonal risks aren’t frost but heat-driven shifting and rainy-season drainage failures.
A schedule that matches this climate:
- March or early April (post-winter, pre-summer): Deep clean with a garden hose and broom. Top up joint sand. Do a 20-minute inspection. This is the primary maintenance weekend of the year.
- Late July or August: Walk the driveway mid-day on a hot afternoon and look for raised pavers, flared joints, or areas that feel spongy underfoot. Heat expansion pushes pavers upward at the edges and against any rigid fixed surface (garage slab, retaining wall). Small fixes in summer prevent chip-outs by fall.
- September or early October: Address drainage before the rain starts. Confirm every swale or strip drain near the driveway is clear. If any low spot held water last winter, this is the month to fix it, not December when it’s already under two inches of rain.
- November through February: Leave the driveway alone. Keep leaves and debris off, especially around drains. Don’t seal, don’t re-sand during the wet season. Polymeric sand needs dry, warm conditions to cure properly, and a sealant applied over damp pavers can trap moisture and cause spalling.
- Every 3 to 5 years (any mild season): Re-seal once the bead test fails. More on that below.
Our technicians have watched what happens when seasons are ignored. In Vacaville, the most common avoidable failure is a homeowner sealing in late fall just before the first big rain. The sealer never cures, moisture sits under it all winter, and by February the surface starts looking cloudy and flaking. A few weeks’ delay would have meant a coat that lasted years. Under our Driveway & Pavers in Vacaville service, we build every install and repair schedule around this exact calendar.
Re-applying Polymeric Joint Sand Without Trapping Moisture
Polymeric sand is the version most Vacaville driveways use, and when it’s installed right, it stays put through rain and traffic far better than plain sand. When it’s installed wrong, it fails to activate, washes out with the first real storm, or traps moisture that turns a healthy paver bed into a mud layer. The difference is mostly about timing and preparation.
Here’s the sequence that actually works, whether you’re doing a small touch-up or having a pro re-sand the whole driveway:
- Confirm it’s the right season. Dry weather, temperatures above 50°F, and no rain forecast for 24 to 48 hours. In Vacaville, that means late spring through early fall. Not November.
- Clean the joints properly. Joints should be about half an inch deep and free of old failed sand, dirt, and weeds. A pressure washer used at low pressure with a fan tip (not a turbo nozzle) is acceptable for this step only. Never use a surface cleaner.
- Let the driveway dry fully. At least 24 hours of dry time before new sand goes in. Polymeric sand needs dry surfaces to activate its binder.
- Sweep the sand in. Work in small sections, sweep diagonally across the joints, and never leave a sand pile sitting on the surface. Piles trap moisture and dry into a hard crust that never quite cleans up.
- Activate with a light water mist. Follow the product label. Typically a fine mist that soaks the joints without flooding the surface. Over-watering is the number one cause of polymeric failure. Under-watering is rare.
- Leave it alone for the cure window. Usually 24 to 72 hours with no vehicles, no foot traffic beyond what the label allows. Getting a car on it early breaks the polymer bond and puts you right back at step one.
One non-negotiable rule around sealer warranties: if the driveway is currently sealed, confirm with the sealer manufacturer whether new polymeric sand on top voids the existing warranty. Some 2-part sealers protect against new sand application. Many acrylic sealers do not. Stripping and re-sealing after sanding is sometimes the cleaner path, and it’s worth the extra line item versus a failed coat.
Sealer Reapplication: The Bead Test and the Right Window
The single point of confusion we get asked about most: how do you know when it’s time to re-seal? The answer isn’t a fixed date on the calendar. It’s a test you can do in 30 seconds.
The bead test: pour a cup of water on a section of the driveway. If it beads up and rolls off like water off a waxed car, the sealer is still doing its job. If it soaks in and leaves a dark spot, the sealer has worn through in that area. Do this test in three or four spots: near the garage, mid-drive, and at the street end. Traffic wears the sealer fastest where vehicles turn and accelerate.
When the test shows failure, you’re ready to re-seal. The right window in Vacaville:
- Surface temperature: between 50°F and 85°F. Avoid sealing when the paver feels hot to the touch. A Vacaville August afternoon at 4 p.m. is too hot.
- Time of day: early morning is ideal. Lower temperatures cures cleaner.
- Weather: no rain in the forecast for 24 hours minimum. 48 hours is safer.
- Moisture: pavers must be bone dry. Not damp, dry. Skip 48 hours after any rain event.
How often? Every 3 to 5 years is typical for a residential driveway in Vacaville. A driveway under shade trees or heavy foot traffic may need it every 3. A driveway in full sun with light traffic may stretch to 5. Sealing more often than the bead test requires can trap moisture, cause cloudy patches, and eventually peel. We’ve seen driveways sealed annually for a decade that were in worse shape than a neighbor’s driveway sealed twice. The wrong schedule isn’t just wasted money. It actively uses up the paver’s life.
For tips on how the surrounding hardscape ties in, our team covers the full picture at our Groundwork Construction Co. of Vacaville home page.
The 20-Minute Annual Inspection Checklist
Twenty minutes once a year catches almost everything that turns into a five-figure repair. Do this in March or early April before summer heat stress and before the fall rainy season. Stick to the sequence:
- Walk the perimeter. Look for pavers pushed up against the garage slab, edging, or retaining walls. Any paver that doesn’t sit perfectly flat with the ones next to it is a flag.
- Touch every suspicious paver. Rock a heel on each corner. If it rocks more than a hair, the sand underneath has failed or the bedding layer is compromised.
- Hose-test for ponding. Run a garden hose over the driveway for two minutes in three or four places, especially low spots and near the garage apron. Watch where water goes. It should flow toward the street or a drain. Any spot that holds water more than five minutes is a drainage problem.
- Look at the joints. Are joints full to about a quarter inch below the paver face? Any hollowed or missing joint gets re-sanded this season.
- Look at the edges. Edging restraints should be tight against the last paver. No gaps. A gap lets pavers walk outward over a season, and once the edge goes, the whole driveway begins to spread.
- Check for fade and chalkiness. If the paver faces look chalky to the touch or the color is noticeably lighter than a protected area under a car, the sealer has likely failed. Do the bead test to confirm.
- Clear the drainage path. Any channel drain, French drain, or swale that takes water away from the driveway needs to be clear of leaves before year-end. This is a five-minute job that saves thousands.
If you answer “yes” to any shifting, rocking, or ponding flag, that’s your trigger to call a professional for a look. Everything else on this list is homeowner work. The inspection is the one piece of maintenance that finds the expensive problems while they’re still cheap.
Why Pavers Outlast Concrete (When Maintained)
Poured concrete is one slab. When it cracks (and in Vacaville’s summer heat, it usually does within 10 to 15 years), the whole section has to be removed and re-poured. A paver driveway is thousands of small, replaceable units sitting on a flexible bedding layer. When a single paver chips or shifts, one paver comes out and one goes back in. When a tree root pushes up a corner, the affected pavers lift, the root is dealt with, and the same pavers go back down. Nothing gets torn out.
That modularity is the structural reason pavers last. The 2018 and 2021 code cycles push more stormwater management onto residential hardscapes in California, and pavers handle it better than concrete because water drains through the joints and into the base. Our installs across Vacaville are designed so that water has somewhere to go besides the low corner of your slab. Modular prefab brands like Plant Prefab and Boxabl have done the same thing in the housing space: the reason those systems last is the same reason pavers last. Small, uniform, replaceable units installed by design, not poured as one big gamble.
That said, “lasts longer” holds only if the maintenance schedule holds. A paver driveway with sand washed out of its joints for three years will fail just as fast as concrete. The difference is that when pavers fail, the fix is a repair. When concrete fails, the fix is replacement.
What Paver Maintenance Costs in Vacaville
Big picture: routine paver maintenance is far cheaper than replacement, and most of it can be done by the homeowner. The line items below are typical ranges for the Vacaville market. Your actual number depends on square footage, paver type, and whether the previous sealer has to be stripped.
- Annual inspection (DIY): $0. This is the highest-return task in the guide.
- Polymeric joint sand top-up, whole driveway (500 – 700 sq ft): roughly $250 to $500 installed. Small spot touch-ups can run under $150.
- Full clean and re-sand: roughly $500 to $900 for a typical two-car driveway.
- Sealer application (solvent-based or water-based): roughly $1.25 to $2.50 per square foot installed. A 600 sq ft driveway sits in the $750 to $1,500 range.
- Sealer strip and re-seal: add $0.75 to $1.50 per square foot for the strip step.
- Individual paver replacement (spot repair): typically $150 to $350 per visit, depending on paver match availability and quantity.
- Drainage correction (adding a channel drain or re-grading a low corner): $600 to $1,800 depending on scope.
Compare that to a full paver driveway replacement, which runs many multiples of the annual maintenance cost. Whatever the exact numbers are, the math is the same: the maintenance schedule is the cheapest part of owning a paver driveway by a wide margin.
Common Mistakes to Avoid
- Pressure washing every spring. Blasting 3,000+ PSI across the surface removes joint sand at a rate the eye can’t see until the pavers start to rock. A garden hose and broom almost always get a driveway dirt-free. In Vacaville, dust and pollen are the main buildup, and neither needs pressure.
- Sealing too often. A fresh coat over a coat that’s still performing traps moisture and eventually peels. Use the bead test. If the water still beads, wait another year.
- Sealing in fall. Polymeric sand and most sealers need dry, warm conditions to cure. A late-October seal in Vacaville that gets rained on two weeks later is a wasted $1,000 and starts the peeling cycle.
- Ignoring the first winter ponding event. A driveway that holds water in one corner after the first big rain is telling you exactly where the failure will appear next summer. Fix the drainage before April.
- Using de-icing salt on the rare icy morning. Vacaville almost never needs it. Sand for traction, sweep up after, and skip the chlorides. They pit the paver surface permanently.
- Letting trades or deliveries park heavy equipment on pavers unprotected. Skid-steer loaders and concrete trucks on pavers without plywood protection crack edges and shear joints. One delivery day can undo a year of good maintenance.
- Buying the cheapest bag of “paver sand” at a big-box store. Non-polymeric play sand washes out. If you’re topping up, use the same polymeric product that was originally installed, or the joints cure at different rates and trap moisture at the seams.
See the difference
 Before
 After
 Before
 After
 Before
 After
When to Call a Professional
Most of this schedule is homeowner-friendly. A few things aren’t, and it’s worth knowing the line. If you find pavers that rock more than a hair, or a low spot that held water for more than a day after a storm, the base underneath is compromised and needs to come up. If the joint sand has completely washed out over more than 20% of the driveway, re-sanding right requires proper cleaning and a dry window that’s hard to hit without a pro’s schedule. If you’re considering a full re-seal with a product you’ve never used, especially a solvent-based sealer, hire it out: sealing too thick, in the wrong weather, or over a damp surface is the number one cause of sealing failures. And if any drainage correction involves lifting pavers, regrading the base, or adding a channel drain, get a professional quote.
Groundwork Construction Co. of Vacaville offers free estimates on paver repair, re-sanding, sealing, and drainage work throughout Vacaville – call (888) 276-8078 to schedule yours. Our technicians have up to 12 years of experience on paver installs and repairs, all of them background-checked and uniformed, and every project we do is backed by our 730-Day Done Right Promise. If it’s not done right, we make it right. Pricing is upfront and the number we quote is the number you pay.
If you’re planning a wider hardscape or yard project alongside the driveway, our Fence Installation in Vacaville service and Home Additions & ADU in Vacaville service both schedule around the same seasonal calendar. We’re one call for the whole property.
Frequently Asked Questions
Every 3 to 5 years, but the actual trigger is a water-bead test, not a calendar. Pour a cup of water on the driveway; if it no longer beads up and rolls off, the sealer has failed and it’s time to reapply. Most Vacaville driveways land on the 4-year mark. Call (888) 276-8078 for an exact quote – estimates are free.
You can, but use low pressure and a fan tip, and avoid a surface cleaner entirely. High-pressure washing strips polymeric joint sand and can pit softer pavers. For most routine cleaning in Vacaville, a garden hose and a stiff broom get the job done without the risk. If your driveway is sealed, call us first – pressure washing over some sealers can damage the coat and void the warranty.
Late spring through early fall, when temperatures are consistently above 50°F and there’s no rain in the forecast for 24 to 48 hours. In Vacaville, April through October is the sweet spot. Avoid the wet season entirely – polymeric sand needs dry curing conditions to activate and stay put. Call (888) 276-8078 if you’d like us to check timing for your specific driveway.
Pavers that rock underfoot, joints that dip below the paver surface by a quarter inch or more, and water that ponds in the same corner after every storm all point to base failure. Small fixes caught early are usually a few hundred dollars of repair; ignored for three years, the same problem can mean a partial rebuild. Call (888) 276-8078 for a free assessment.
Not on our projects. We provide an upfront, line-item quote before any work begins, and the number you see is the number you pay. If we open up a repair and find an issue the quote didn’t anticipate, we stop and re-scope with you before proceeding – we don’t surprise you with a bigger invoice at the end. That’s how our pricing has always worked in Vacaville.
Most residential driveways in Vacaville are cleaned, prepped, and sealed within a single day, with a 24- to 48-hour dry window afterward before vehicles go back on. Full strip-and-reseal jobs may take two days. We schedule around weather, so we don’t start a sealing job if rain is forecast within the cure window. Call (888) 276-8078 for a firm timeline on your driveway.
The Bottom Line
A paver driveway in Vacaville that gets the right care at the right intervals outlasts poured concrete by decades. The maintenance schedule that works is short: keep the joints full, walk the driveway once a year with a hose and a critical eye, and re-seal every 3 to 5 years based on the bead test, not the calendar. Skip the pressure washing ritual. Skip the de-icing salt. Skip the fall sealing. Do those three things and you’ll spend a fraction of what a concrete replacement would cost, and you’ll never have to tear the whole thing out. Twenty minutes once a year is the whole ask.
Ready for a Free Estimate?

If your paver driveway has shifted, lost joint sand, needs a fresh seal, or has a drainage problem you’ve been putting off, we’ll come out and put the real options in writing. No pressure, no change orders, no vague bids. Groundwork Construction Co. of Vacaville offers free project estimates and design consults, upfront pricing on every line, and our 730-Day Done Right Promise on the work we do. We answer the phone with a live person 24/7 – no voicemail black holes, no waiting until Monday. Call (888) 276-8078 to schedule your free estimate, or ask about our current promotions: $1,000 off projects over $10,000 and 0% financing for 18 months on approved credit. From foundation to finish line, we’re here for the whole property.
Written by the team at Groundwork Construction Co. of Vacaville.